Once you have created groups for all lighting fixtures, you can commission lamps based on your needs.
1. Dimming & CCT Tunable
2. Sensor Setting (Motion Sensor and Daylight Sensor)
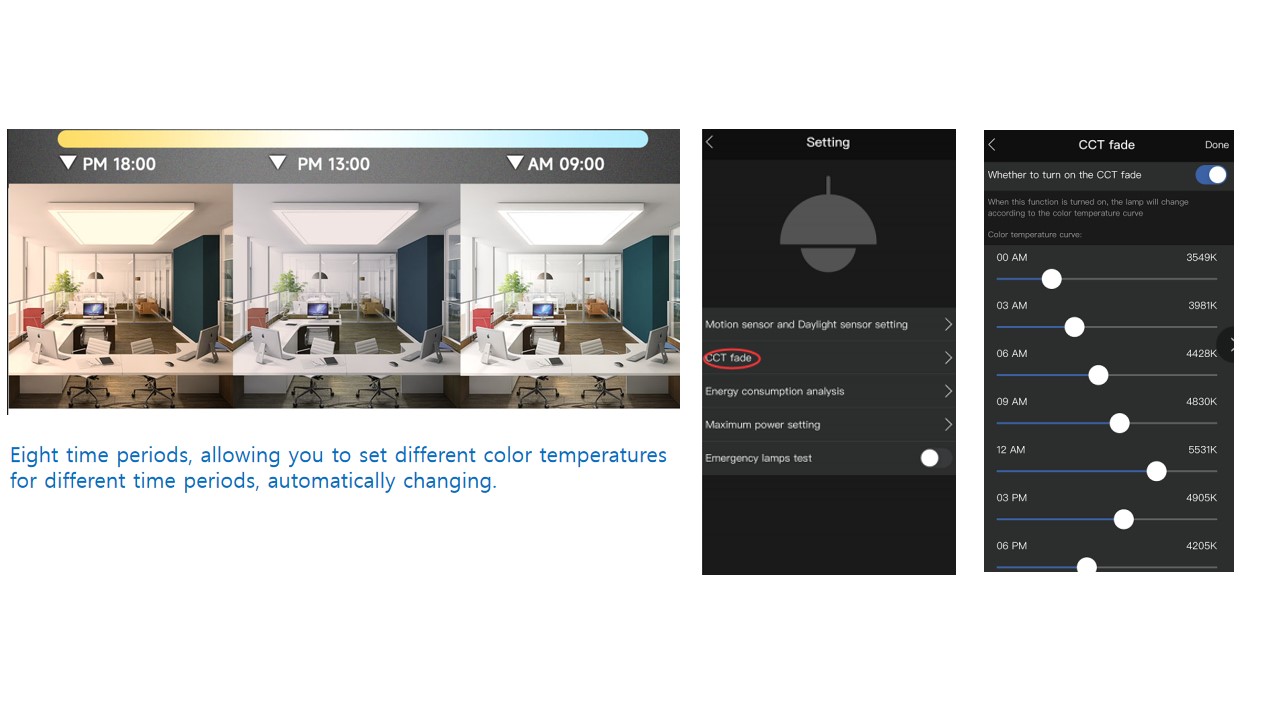
3. CCT Fade
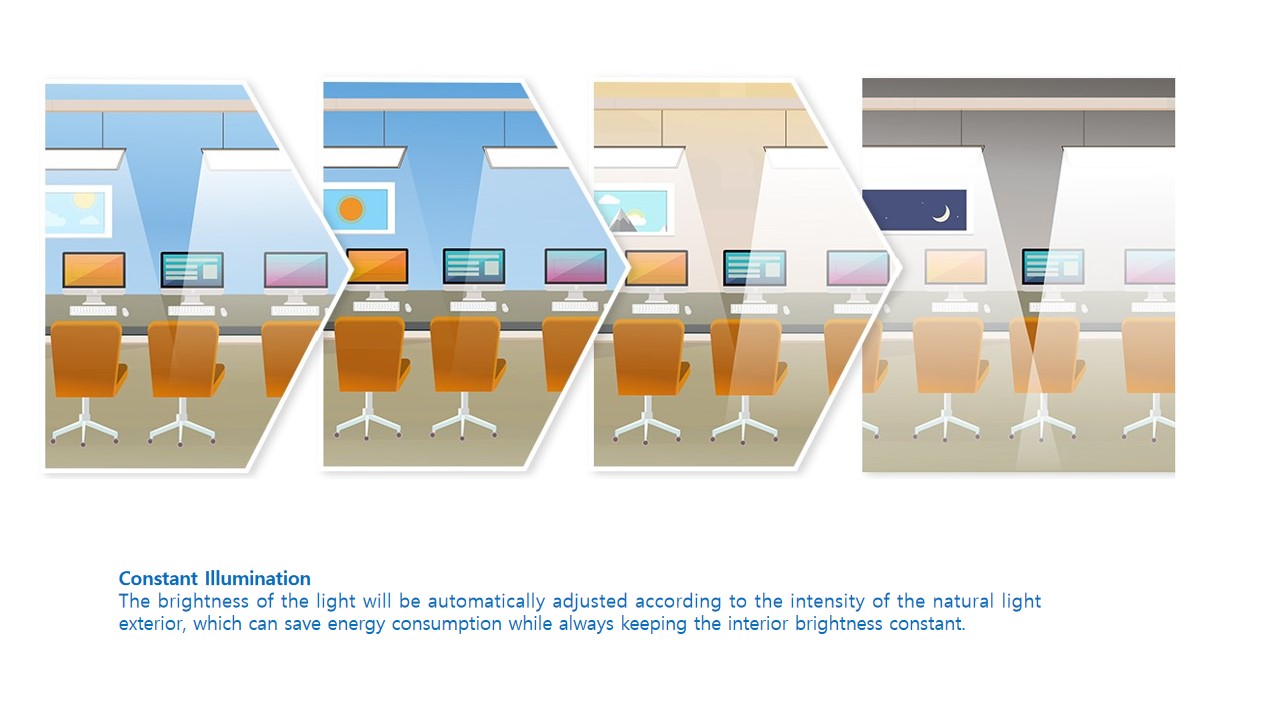
4. Daylight Harvesting
5. Create Scene
6. Timer
7. Synchronization
8. Single OTA
9. Mesh OTA
10. Data Acquisition / Pairing Gateway
11. Energy Monitor
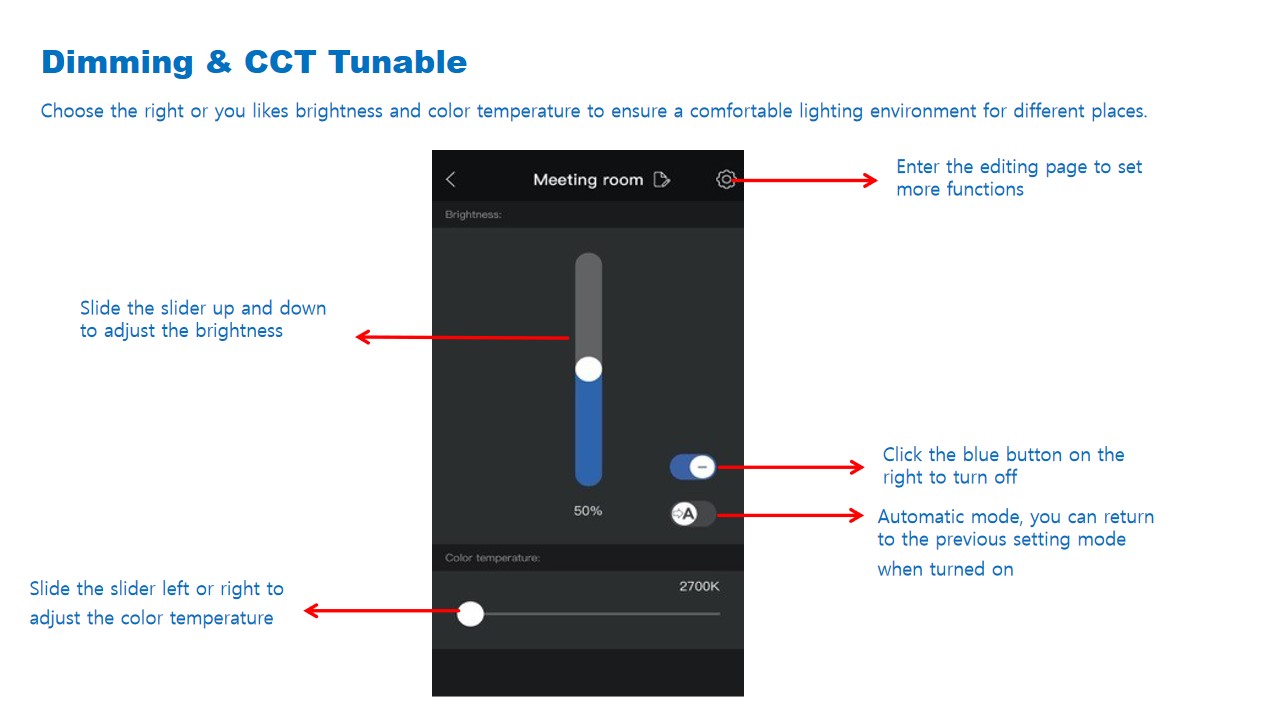
1. Dimming & CCT Tunable
Set the brightness and color temperature for the group.
2. Sensor Setting (Motion Sensor and Daylight Sensor)
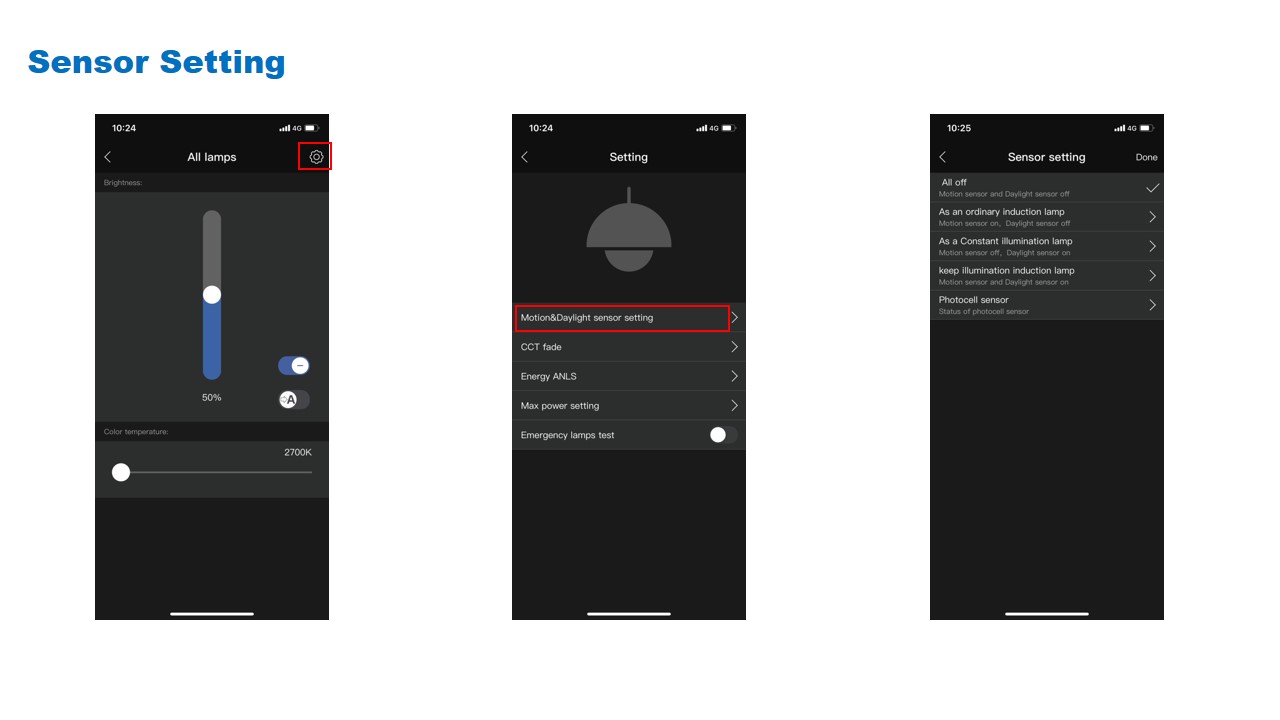
a. As an ordinary induction lamp
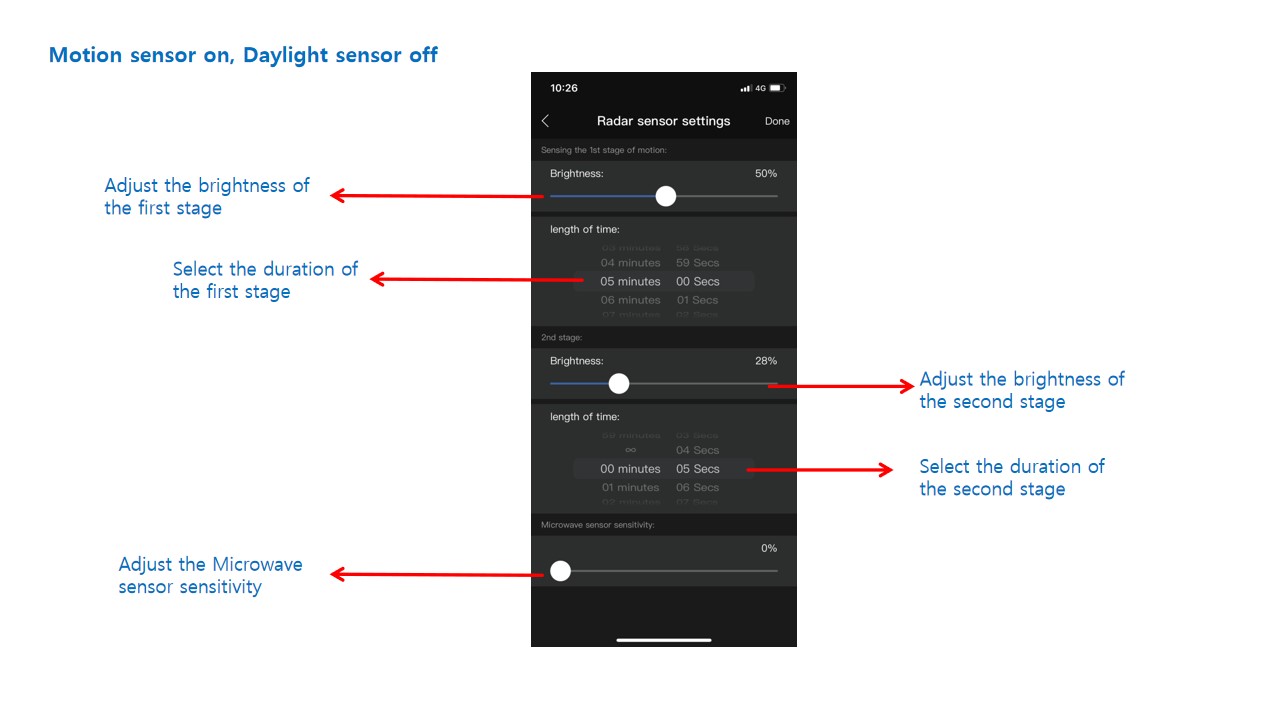
b. As a constant illumination lamp
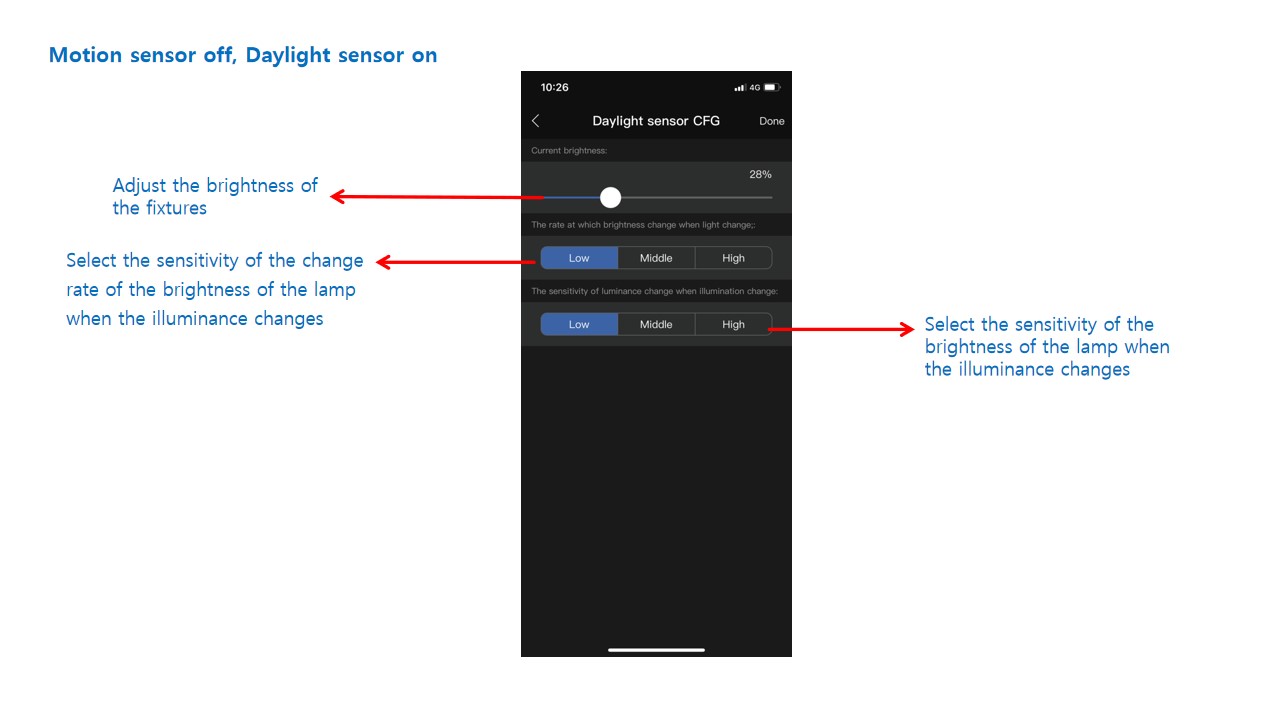
c. Keep illumination induction lamp
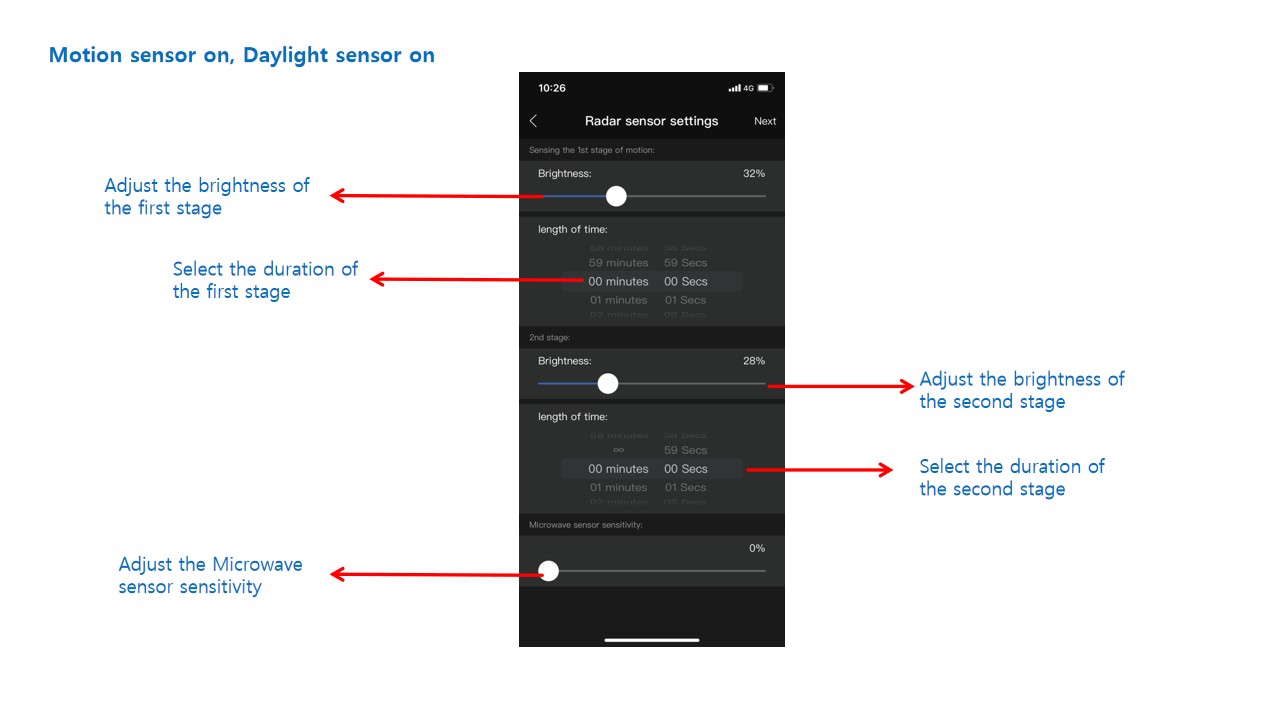
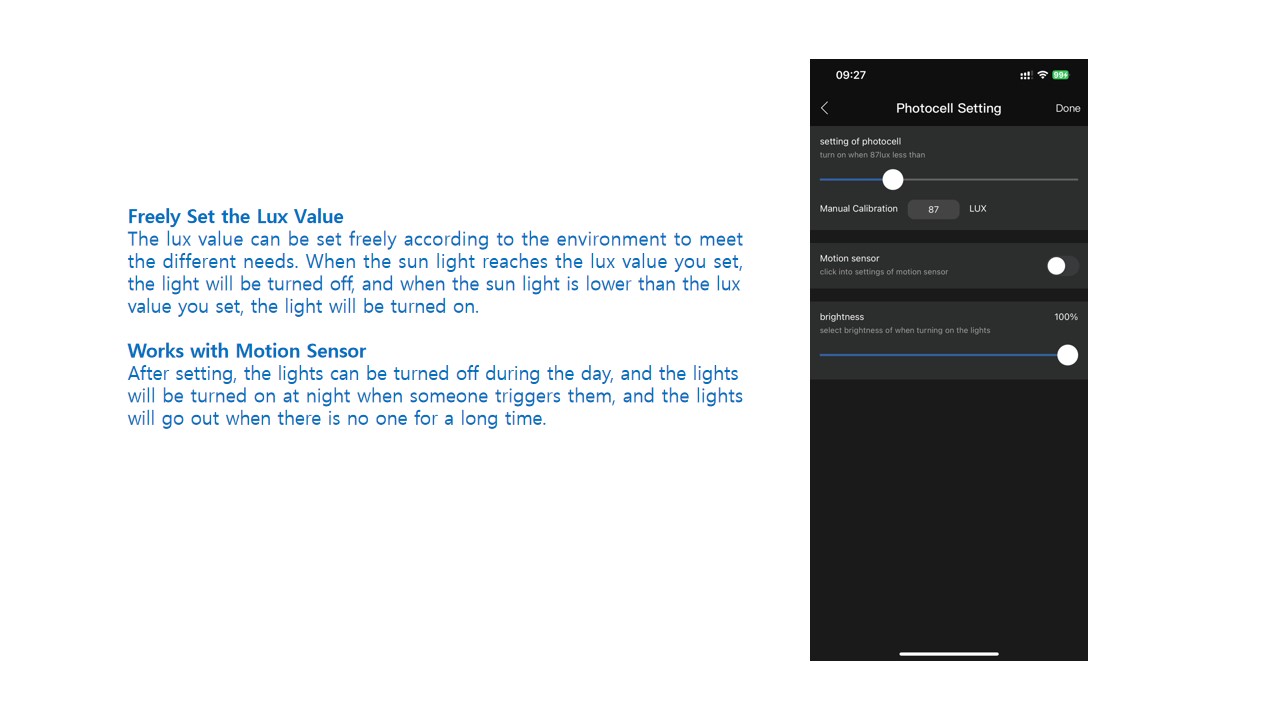
d. Photecell sensor
3. CCT Fade
4. Daylight Harvesting
5. Create Scene
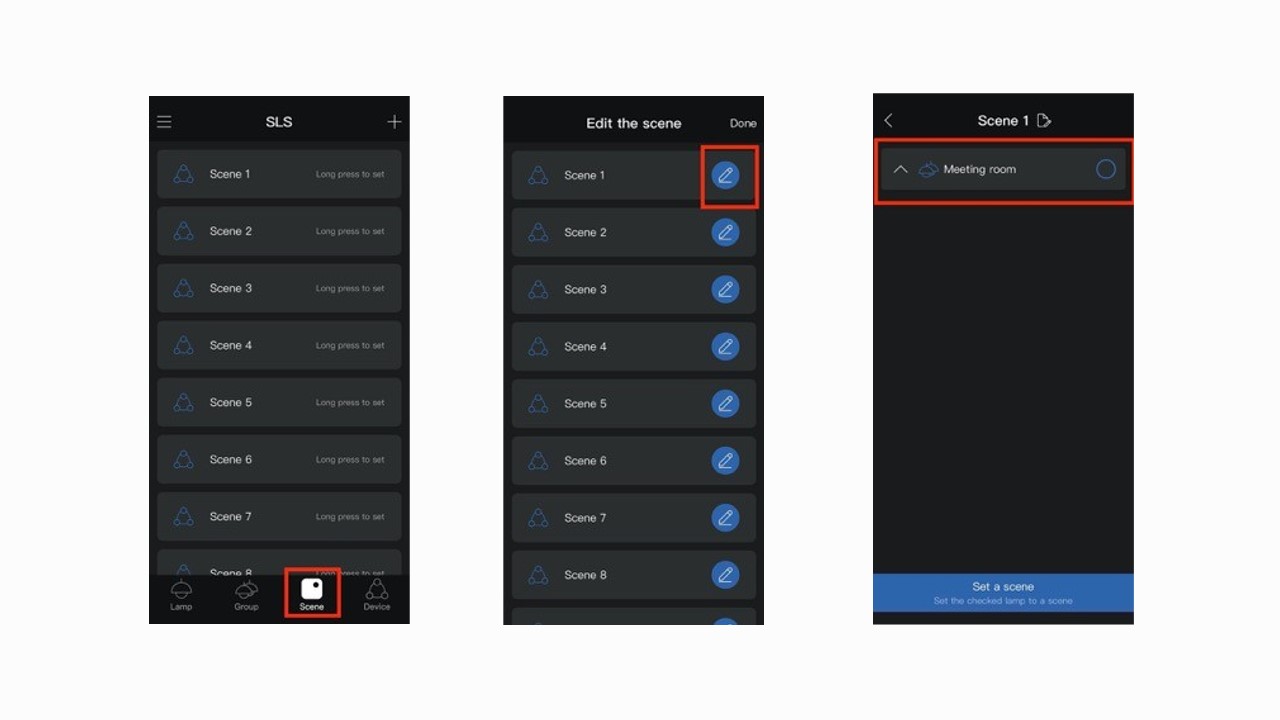
1. Click ”Scene" at the bottom of the screen
2. Long press a group, Click the "Pencil" icon to enter scene editing
3. Select the fixture or light group to be edited
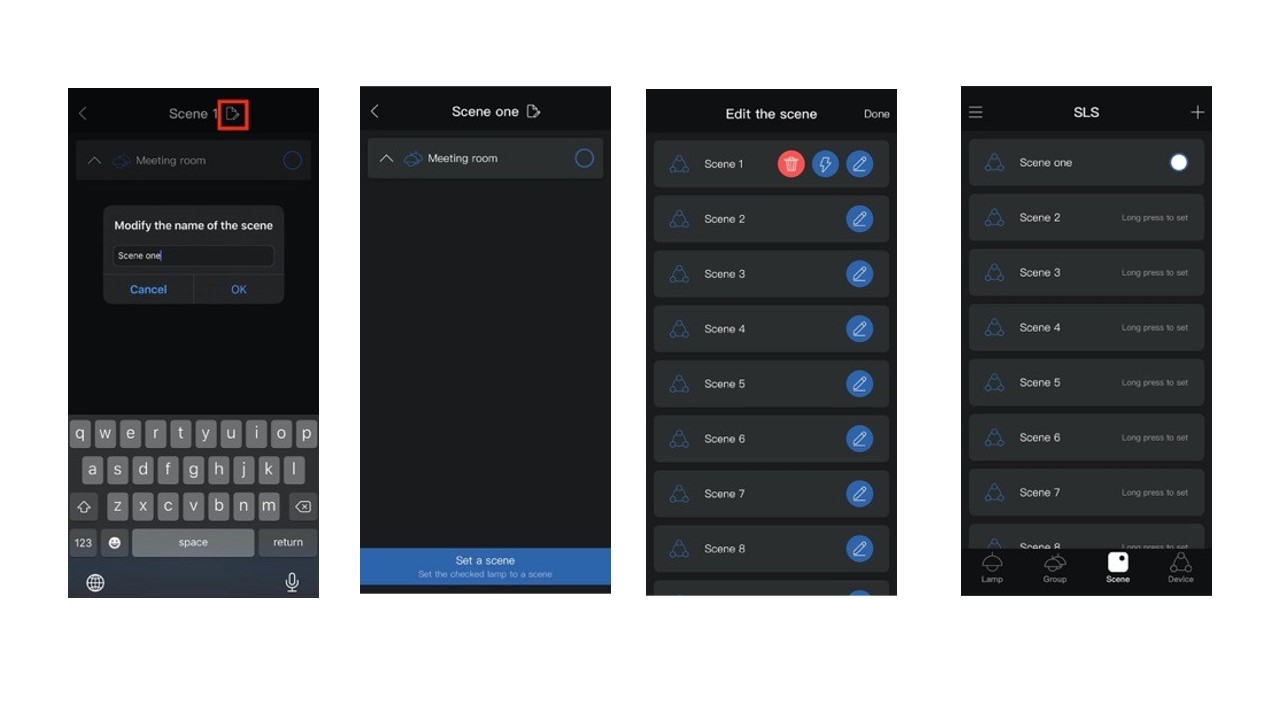
4. Click the edit icon to the right of the fixture Input the Scene name in the box and click “ok" to save it
5. After the addition is completed, it will automatically return to the main interface. Click the "red" icon to delete the light group just set. Click the ”pencil" icon to continue adding fixtures to the light group
6. Timer
Set the fixtures daily or weekly according to their own ideas, and let the fixtures work according to the set time and data. Scheduled setting of lamps in a planned way, saving work efficiency and energy.
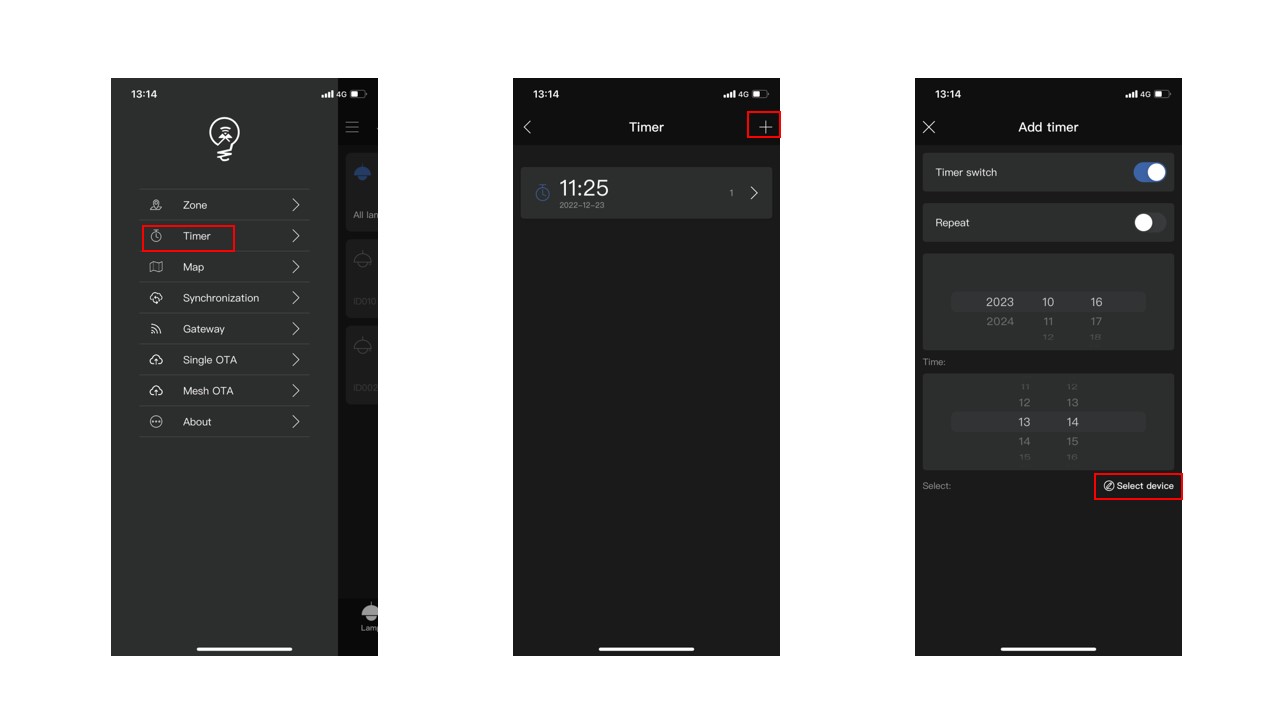
1. Click the upper left corner to enable sub-functions
2. Choose“Timer”,Click“➕ ”
3. Set the date and time and click "Select device"
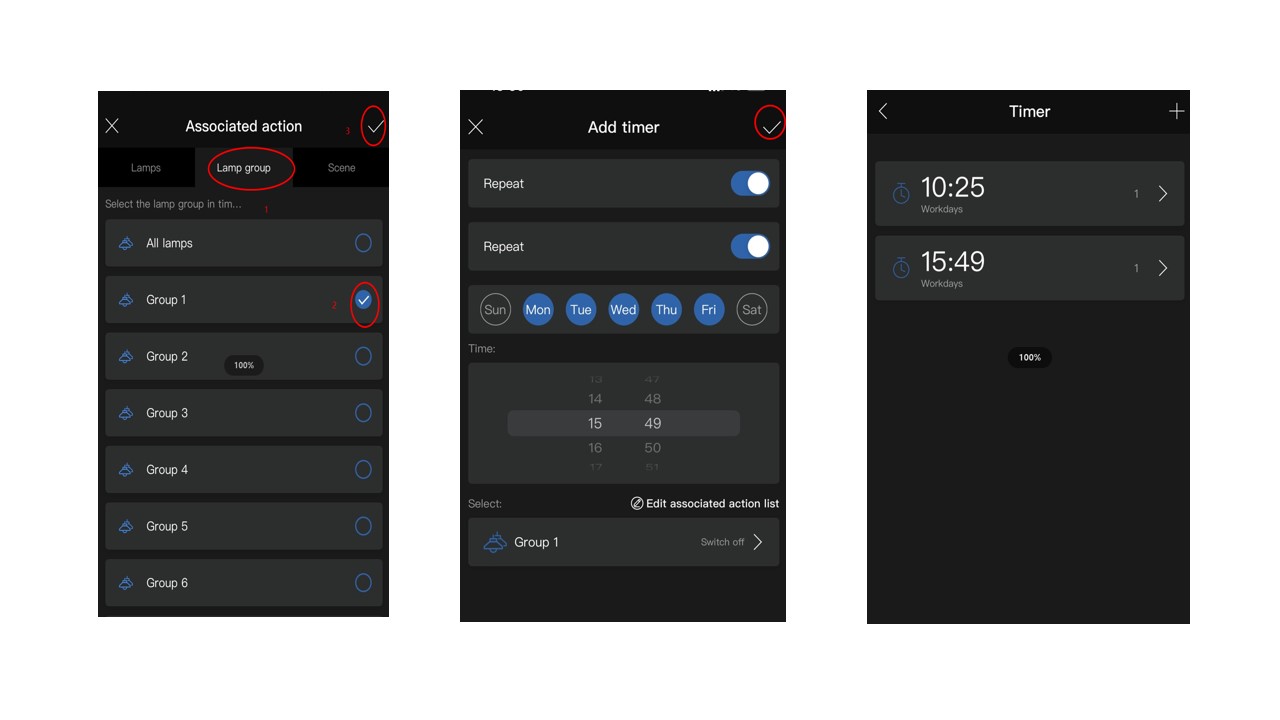 4. Turn on the timer switch button,You may choose to repeat the timer and the date and time.
5. You can bind lamps, light group, scene
6. Click ”✅" in the upper right corner to complete the setting
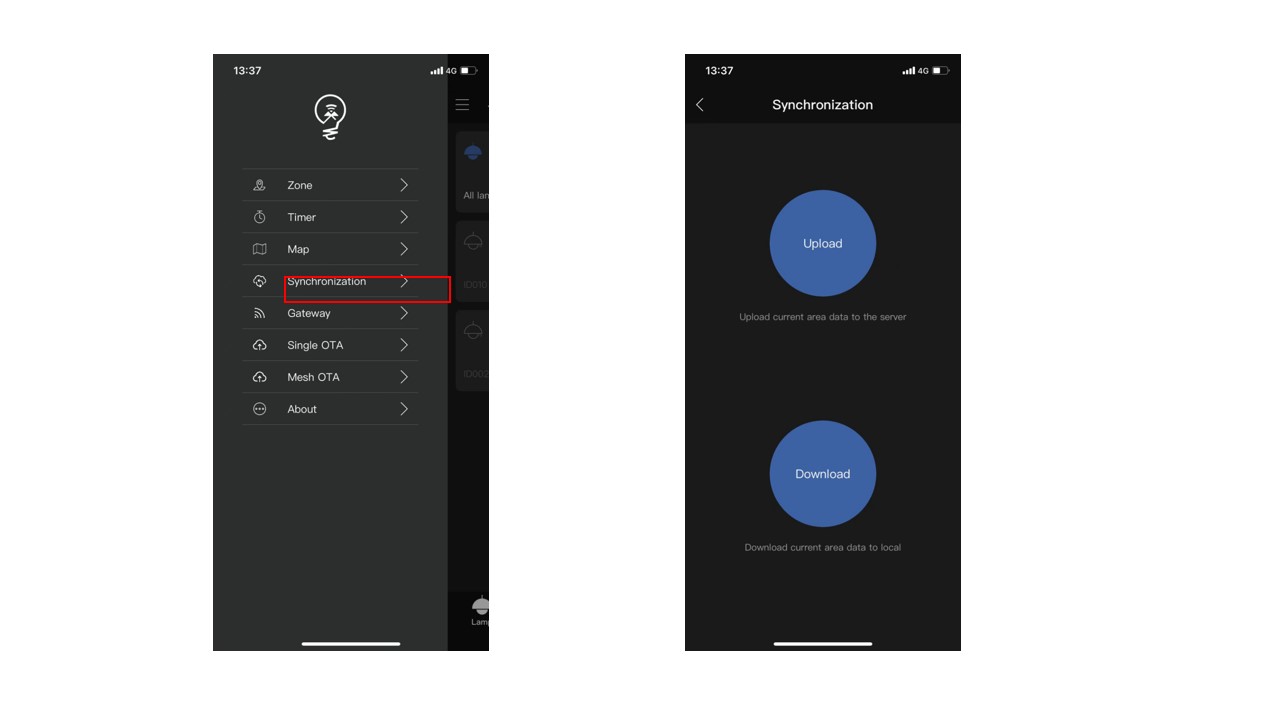
7. Synchronization
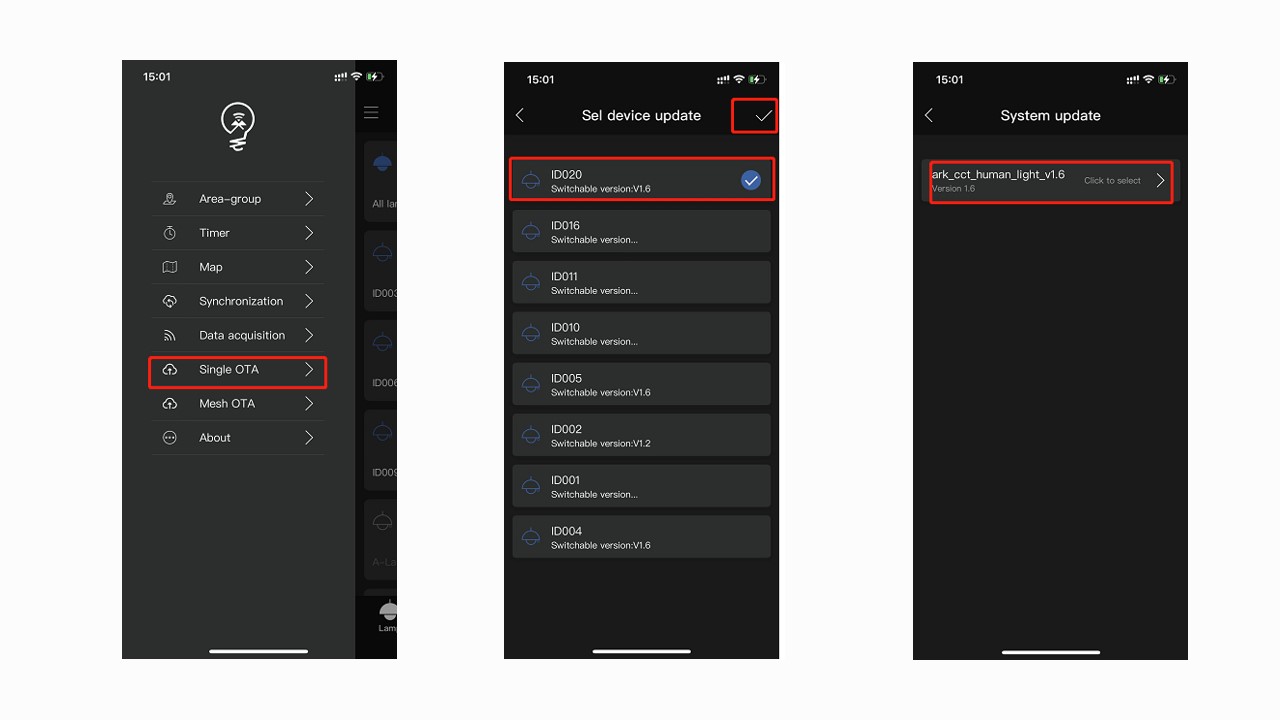
8. Single OTA
1. Select Single OTA
2. Click the devices that need to be upgraded and click √
3. Select the underlying code that can be upgraded
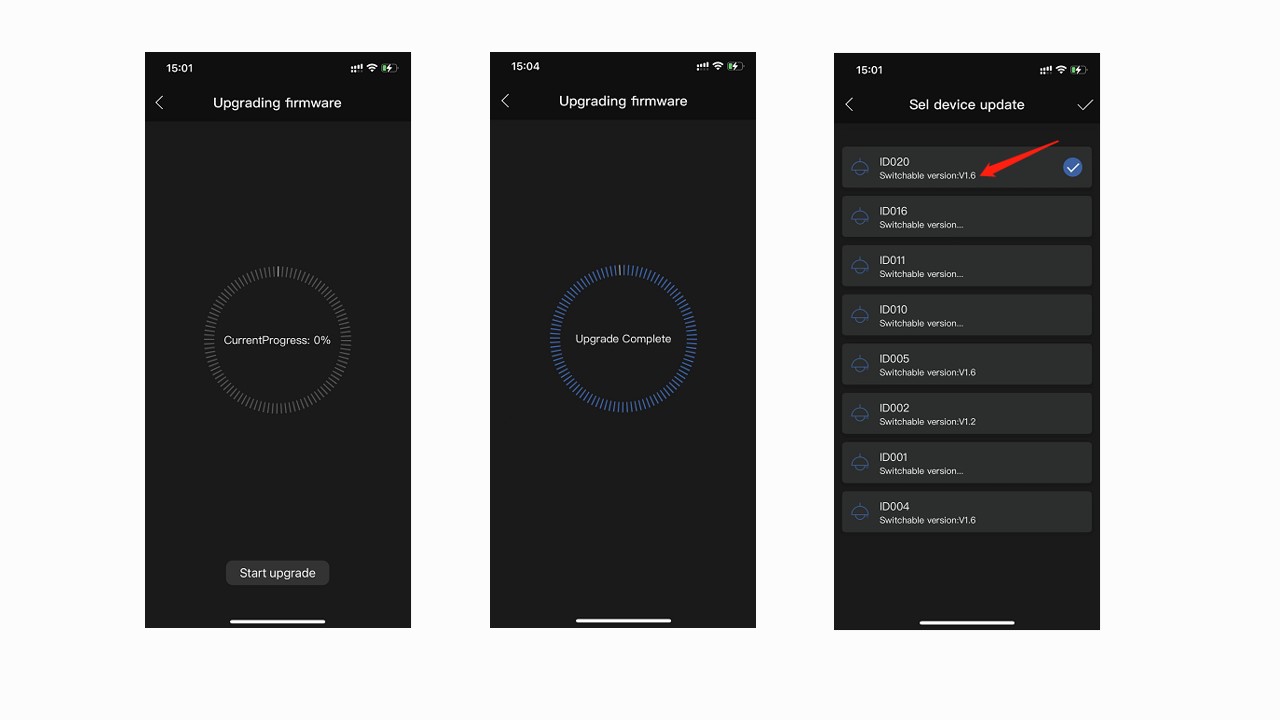
4. Start the upgrade and wait for the progress bar to finish
5. The upgrade is complete and the device version number changes.
6.Please note: OTA can bring functions upgraded but will make the previous programing invaild, it only keep lamps in the Zone without any programing.
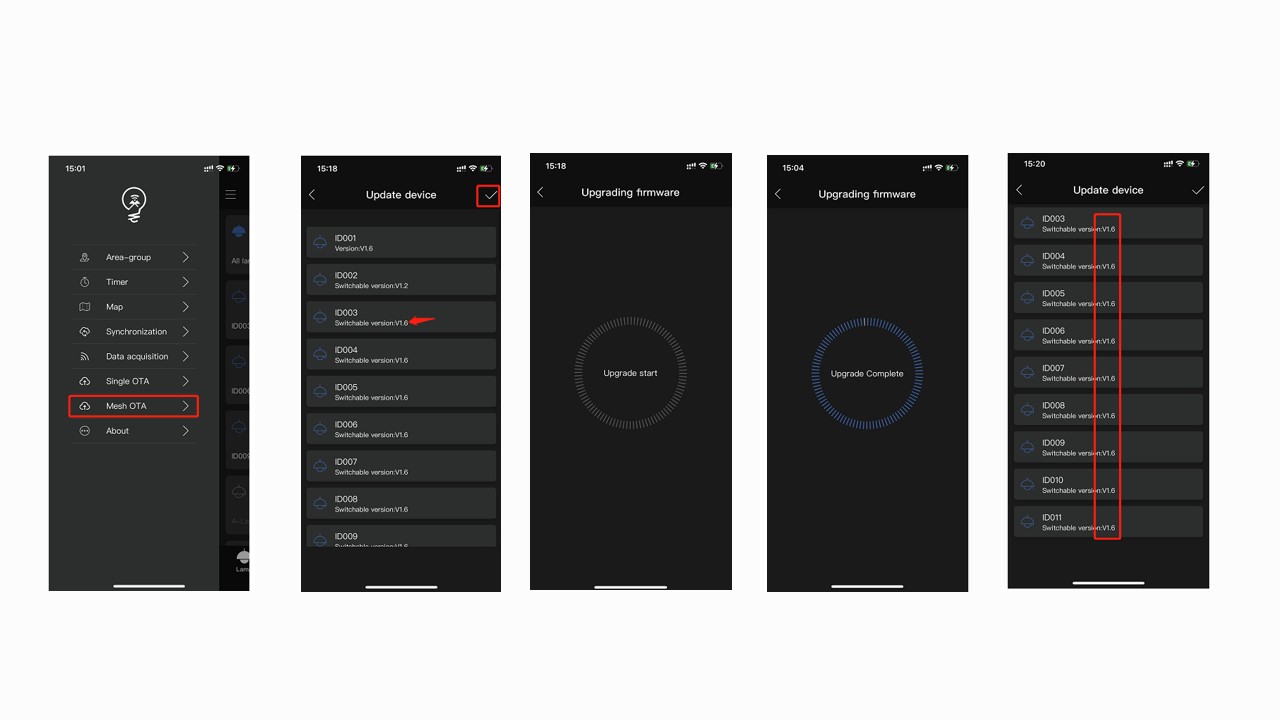
9. Mesh OTA
1. Select Mesh OTA
2. Select the device with the highest version of all current devices
3. Click √ start the upgrade and wait for the progress bar to finish
4.After the progress bar is finished, go back to the device page to see if all the version numbers have been the same, and the upgrade has been successful
5.Please note: OTA can bring functions upgraded but will make the previous programing invaild, it only keep lamps in the Zone without any programing.
10. Data Acquisition / Pairing Gateway
a. Reset Bluetooth switch
b. app search switch
c. The switch is added
d. Reset WiFi network
e. Fill in the WiFi name and password in the data collection
f. WiFi gateway added successfully
The first time for Pairing:
The second time or mulitple times for Pairing
11. Engery Monitor
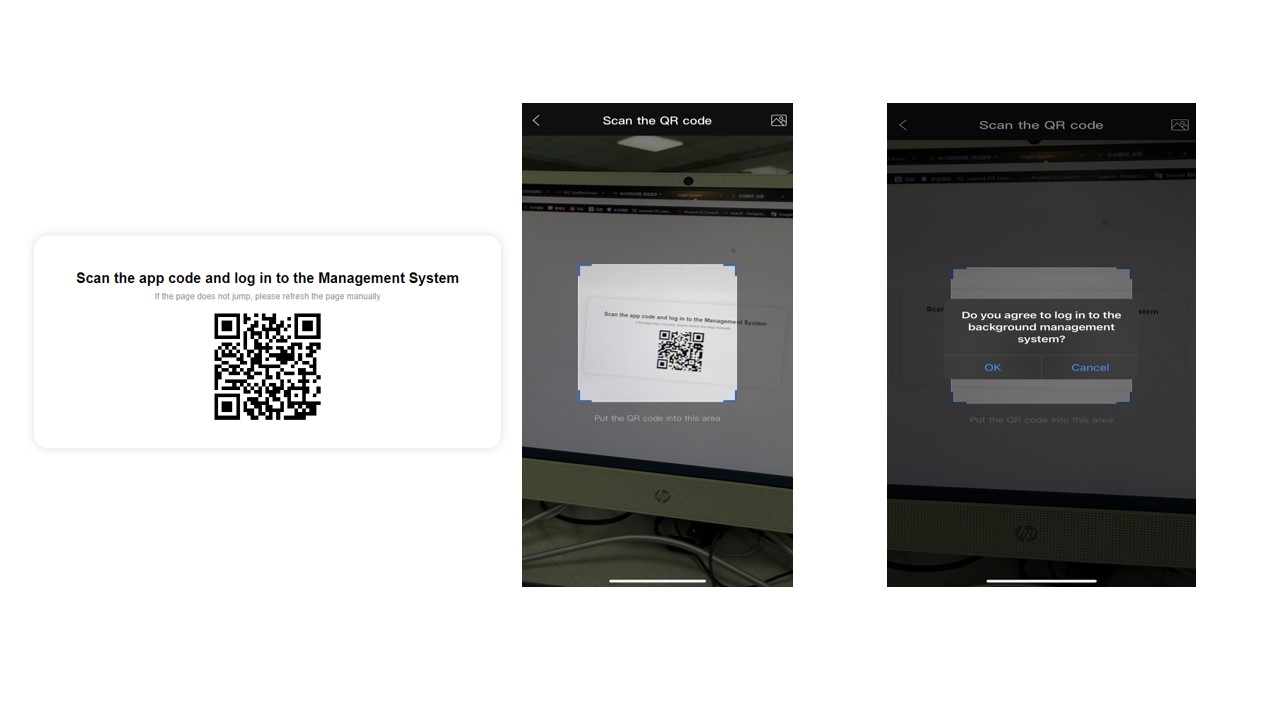
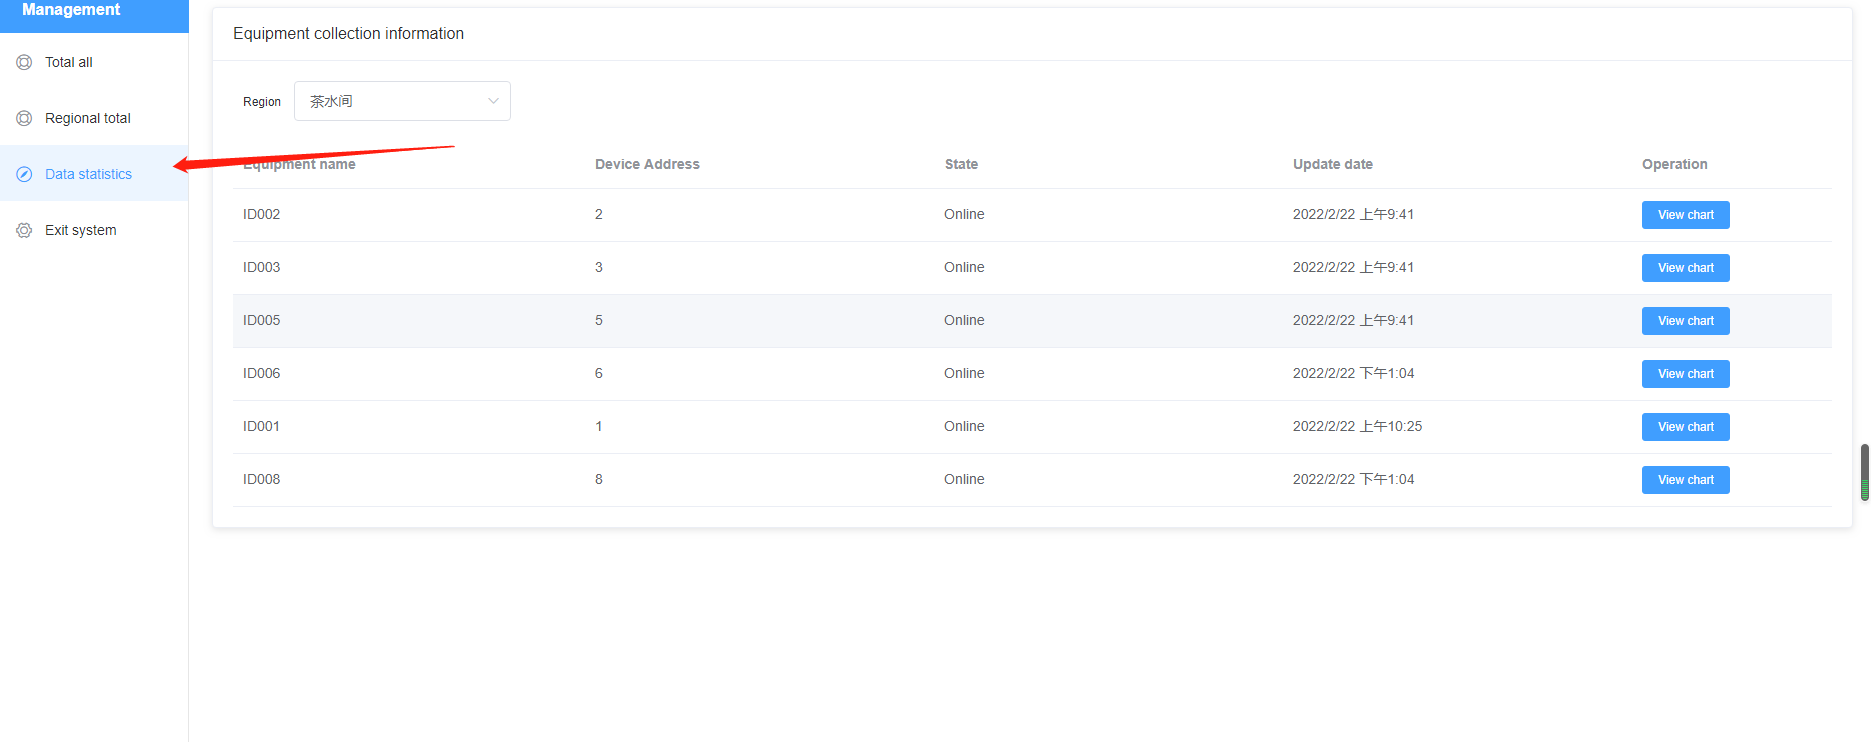
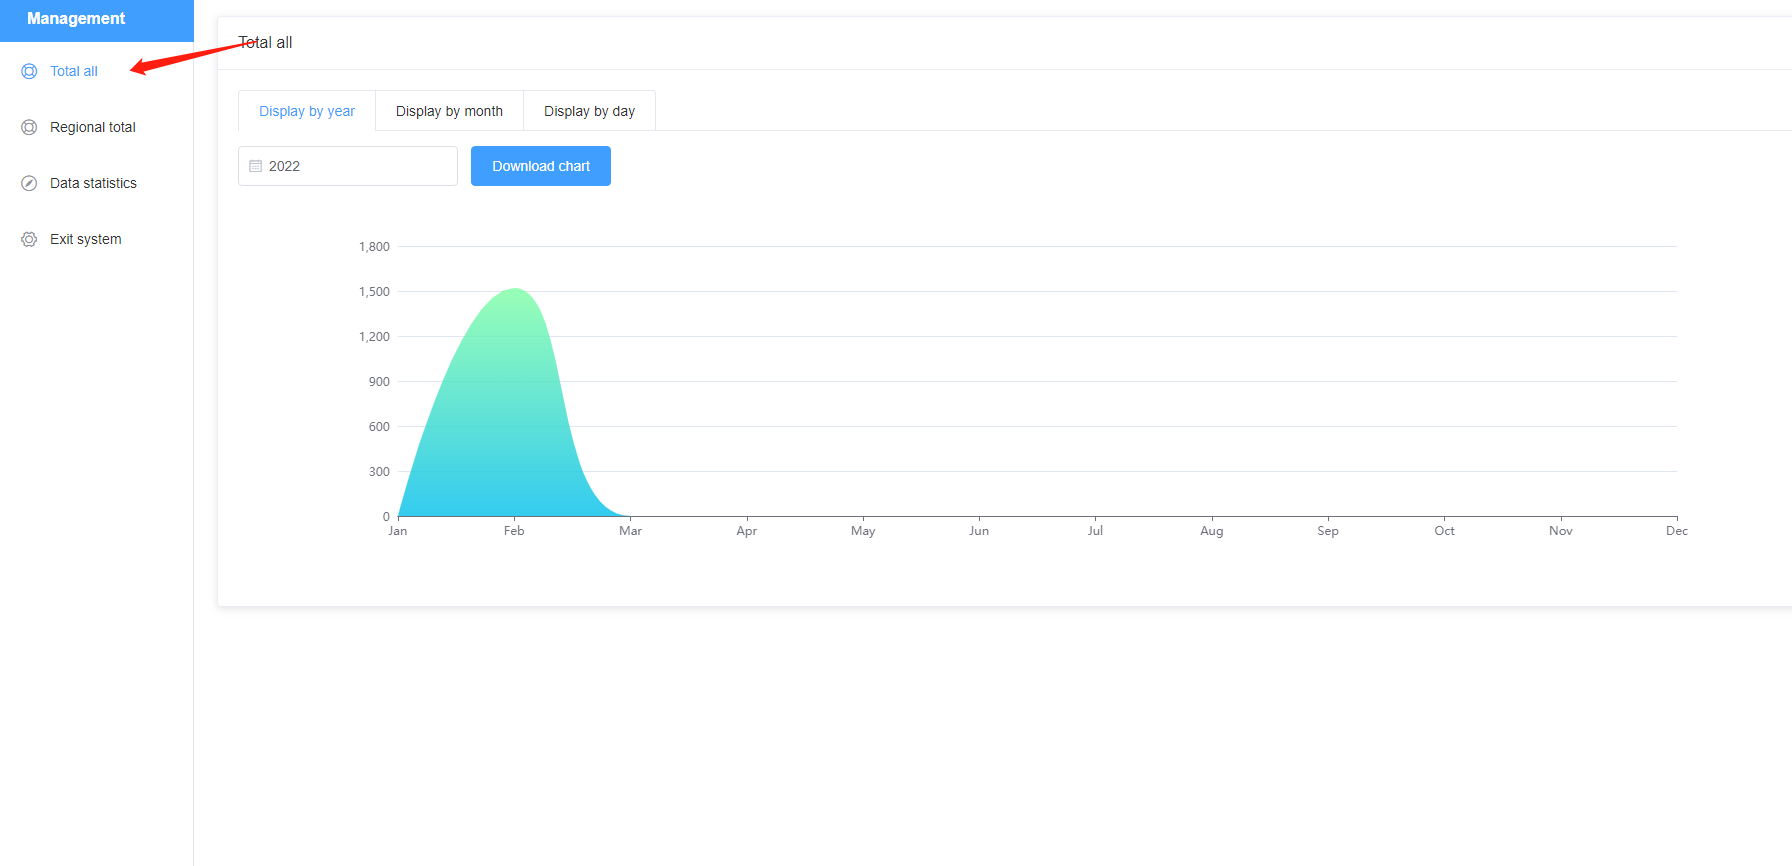
1. Log on to a cloud platform: http://3.136.59.53:8082/web/#/LoginPc
2. Scan the QR code with the APP
3. After login, you can view the energy statisitics;
4. Support annual/monthly/daily energy monitoring;
5. Supports Energy Monitoring for individual devices;
6.Support table export
Energy statistics and remote control
Notes: Energy statistics may not work for the following reasons:
1. The network is not connected
2. The number of devices exceeds 60, and the bluetooth chip limit exceeds 60, it will not be uploaded.
3. The switch is not added to the area
4. Need to manually go to the data collection to open the collection, and need to select the device.


 4. Turn on the timer switch button,You may choose to repeat the timer and the date and time.
